Turn Your Cat Into a Knight: What Makes a Photo Work
 Knight Cat AI Team
Turn your cat into a knight from a photo: how lighting, eye visibility, framing and background separation decide if the render keeps your pet recognizable.
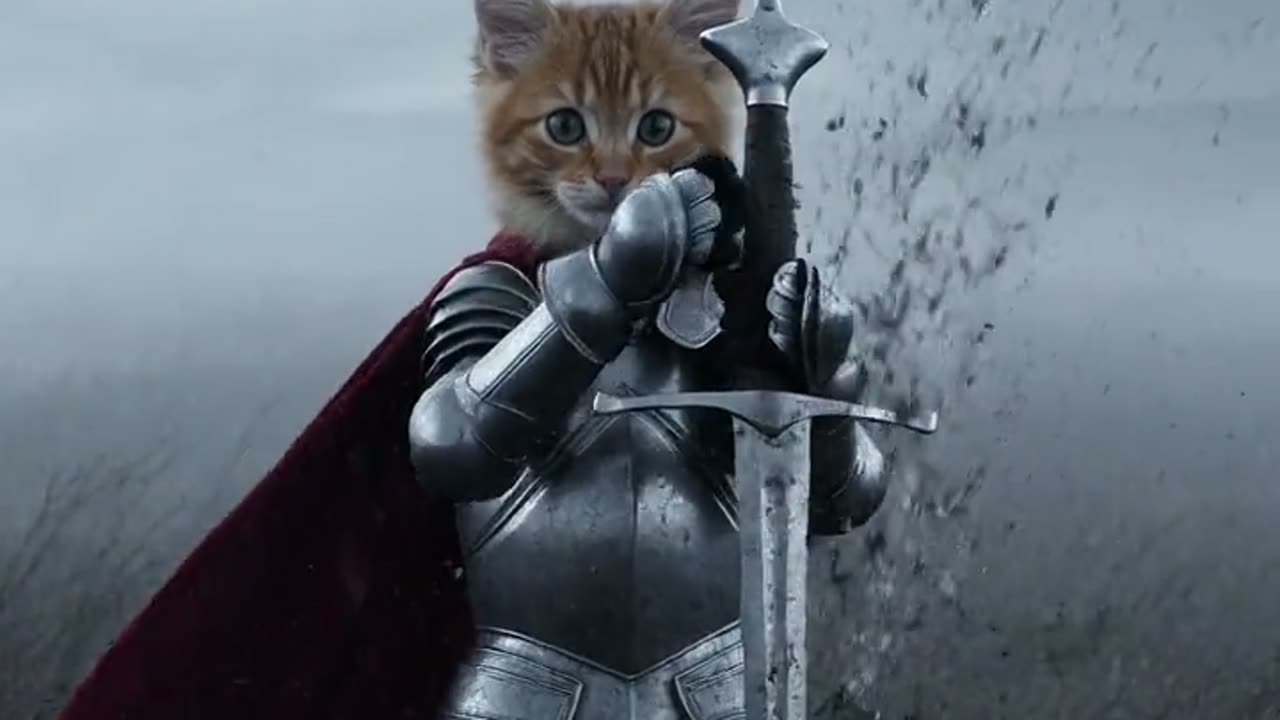
You turn your cat into a knight by uploading one photo to the studio, choosing one of four medieval presets, and letting the Seedance 2.0 model render a roughly ten-second vertical clip of that same pet in armor. The photo is the only part of that pipeline you control precisely, and it decides most of the outcome, because the model uses it as an identity reference rather than as a style suggestion. A photo with even, soft light, both eyes visible, one subject, and a background that separates cleanly from the fur will hold your cat's markings and face shape through the wardrobe change. A rushed phone snapshot usually will not.
What the reference photo actually controls
The upload does two separate jobs, and mixing them up is the source of most disappointing renders.
The first job is identity anchoring. The model reads your photo and pins the subject's fur pattern, face shape, eye colour, ear set and markings. Those attributes become constraints, so the preset is free to change the armor, the setting and the light while the animal itself stays recognisable. When people say the output "looks like a generic knight cat, not my cat", weak anchoring is almost always the reason.
The second job is geometry supply. The model only knows about body shapes it can see. If your photo shows a seated cat and the preset or your extra text implies a standing pose, the model has no image evidence for the legs, belly and underside, so it guesses. Guessing is where extra paws and duplicated tails come from.
Everything below follows from those two jobs. Lighting and sharpness feed anchoring. Pose and framing feed geometry. Background and subject count affect both.
You can see the effect immediately by running one render with your current favourite photo and one with a deliberately prepared photo. The studio is on this page.
This clip: 30 credits · 6 clips a month for $39.90 (Pro), or 80 a year for $319
Lighting: the first filter
The model does not need dramatic light. It needs light that describes form without hiding it.
Soft, directional daylight from a window, falling across the face at a modest angle, is close to ideal. It gives the fur texture visible edges and keeps the eyes readable. Overcast outdoor light behaves similarly and is often easier to find.
Hard direct sun creates two problems at once. Bright highlights clip to flat white on pale fur, and the shadow side of the face collapses into a dark mass with no visible markings. Both reduce what the model can anchor to. Flash fired straight at the animal does the same thing on a smaller scale: it flattens the face, removes shadow that defines the muzzle, and produces a bright reflection in the eyes that can mask the pupil shape.
Backlighting is the third case to avoid. A cat sitting in front of a bright window becomes a silhouette, and a silhouette contains almost no identity information, so the model is left to invent a plausible cat instead of transferring yours.
If your only good photo is dim, prefer a slightly noisy but evenly lit shot over a bright one where half the face is blown out. Noise is a smaller problem than missing detail.
Eye visibility and face readability
Both eyes visible, open, and in focus is the single highest-value property a reference photo can have. The face is where identity is judged, and the eyes are where viewers check it.
Three situations break this:
- One eye hidden by the angle of the head, so the model must synthesise the hidden eye. The result is often asymmetrical or slightly wrong, and it reads as uncanny even when nothing else is off.
- Squinting or a closed-eye blink, which removes the eye colour and eye shape signals that anchor the identity.
- Motion blur or missed focus on the face, which leaves the model nothing precise to pin to.
Get the camera to the animal's eye level rather than looking down at it from standing height. That single change fixes the angle problem for most indoor shots and also improves how the head reads in a vertical frame.
If your cat will not hold still, take a burst and keep the frame where the pupils are sharpest, even if the pose is less flattering. Sharpness on the face beats a nicer body angle every time.
Frame one subject
A second animal or a person in the frame is the most common cause of a render where the wrong thing gets armored, or where both subjects get half-rendered because the model divided its attention.
Remove other pets, remove people, and remove anything that reads as a second living subject. This is not only an aesthetic preference. The model has to decide what the subject is, and a frame with two animals gives it two candidate answers. Sometimes it commits to the wrong one, and sometimes it blends features from both.
Toys and objects are usually harmless, but a large object that overlaps the animal's body, such as a cushion pressed against the chest or a blanket over the legs, effectively hides geometry you might later need. Keep the animal's own silhouette as unobstructed as you reasonably can.
Head-and-shoulders versus full body
Both crops work, and they do different things.
A head-and-shoulders crop concentrates detail on the face. The animal occupies more pixels, which strengthens anchoring, and there is less body for the model to interpret. It suits presets and prompts that call for a portrait-like treatment, a slow push-in, or a sentinel pose where the cat is planted and only ambient motion happens.
A full-body crop supplies more geometry. It tells the model how long the legs are, where the tail sits, and how the body carries weight, which makes walking and stepping shots more reliable. The trade-off is that the face occupies fewer pixels, so identity anchoring is slightly weaker.
| Crop | What it strengthens | Best for | | ------------------ | ---------------------------------------------- | --------------------------------------------------------- | | Head-and-shoulders | Face detail, eye readability, marking transfer | Portrait framing, locked-off shots, ambient motion | | Full body | Leg and tail geometry, proportions, stance | Walking, stepping, and any shot where the whole pet moves | | Mid shot | A usable balance of both | A safe default when you only have one photo |
If you only have one photo and you are not sure which preset you want, a mid shot that includes the head clearly and most of the torso is the most forgiving choice. If you have the option, prepare both and use the head-and-shoulders version for portraits and the full-body version for motion.
Background separation
The model needs to know where your cat ends. A background that looks like the cat makes that harder.
Plain walls, floors, and soft out-of-focus interiors separate well. Cluttered shelving, patterned rugs, and fabric with a print similar in tone to the fur do not. The failure mode is fur that dissolves into the background at the edges, so the model can no longer tell which pixels are animal, and the silhouette it produces is sloppy.
Depth of field helps, but you do not need a fast lens. Moving the animal a metre away from the wall and shooting from a low angle often produces more separation than any setting on the camera, simply because the wall is further away and softer.
The photo do and don't table
| Do this | Avoid this | Failure it prevents | | ------------------------------------- | --------------------------------------- | -------------------------------------------------- | | Soft window light across the face | Direct sun or straight-on flash | Blown highlights, face detail lost, weak anchoring | | Both eyes open, sharp, at eye level | Head turned so one eye is hidden | Synthetic eye, asymmetrical face, uncanny result | | One animal in frame | A second pet or a person | Wrong subject armored, or blended features | | Plain or softly blurred background | Busy pattern close in tone to the fur | Fur edges dissolve, ragged silhouette | | Pose that matches the action you want | Requesting a pose the photo never shows | Extra limbs, duplicated paws, stray tail | | Mid or head-and-shoulders crop | A wide shot where the pet is small | Weak identity anchoring, generic-looking cat |
How identity anchoring transfers fur pattern and face shape
Anchoring is not a style transfer. The model is not painting armor over your photo. It is generating new frames while conditioning the subject on the reference image, which is why the transfer behaves the way it does.
Fur pattern transfer is the most visible part. Tabby stripes, tuxedo blocks, tortoiseshell patches and the specific asymmetry of a face blaze all survive a wardrobe change because they are high-contrast, repeatable features the model can lock onto. The more of the pattern is visible in the reference, the more of it arrives in the output. A photo showing only the head of a tabby transfers the head stripes but gives the model no evidence for the body pattern, so the torso pattern is plausible rather than correct.
Face shape transfer is subtler and more important for recognition. Ear set, muzzle length, the curve of the brow, and the width of the cheekbones are what make one cat distinguishable from another at a glance. These read best at close range and in even light, which is why the head-and-shoulders crop is not just a convenience but an anchoring strategy.
Two things erode both. Distance, because at a wide framing the face occupies too few pixels to extract shape. And compression, because heavy JPEG artefacts damage exactly the fine fur detail that carries the pattern.
Dogs work the same way
The pipeline is not cat-specific. You upload one photo of a dog and the same four presets render that dog as a tiny armored knight, using the same identity anchoring on coat colour, markings and face shape.
Photo requirements carry over without changes. Even light, both eyes visible, one subject, clean background separation, and a pose that matches the motion you intend. Dogs are often easier for the geometry step, because a standing dog photo supplies leg positions that a curled sleeping cat photo does not, but a blurry or badly lit dog photo fails in the same ways a bad cat photo does.
The one adjustment worth making is framing. Long-snouted breeds need the head slightly larger in frame to keep the muzzle readable, and the eyes of a dark-coated dog benefit from a brighter, more frontal light source than a pale cat would.
From good photo to finished clip
- Choose the photo using the table above. If you have several, pick the one with the sharpest eyes and the cleanest background.
- Pick a preset. Scene, wardrobe and camera move come from the preset.
castle_gateandmilk_guardianare the most forgiving for a first attempt, because both ask for a stable pose and small ambient motion. - Keep the shot to one action. A single dominant motion renders cleanly. Two or three stacked actions smear or drop.
- Choose a resolution. Default delivery is Standard · 1080p · 12s for 30 credits. The Standard 720p twelve-second render is 10 credits, and 480p at twelve seconds is 5 credits. Current tiers are listed on the pricing page.
- Render and download. The output is private to your account, carries no watermark, and arrives as an MP4. A failed render is refunded to the balance it came from.
If you want the full pipeline explained end to end, including how text-to-video differs, start with the video generator overview. If you already have a photo you trust and want to plan a sequence of shots, the step-by-step walkthrough covers chaining them. And if you like the framing where your pet stands small beside an oversized armored figure, the tiny knight and giant protector breakdown explains how a second large figure changes what the model has to keep consistent.
FAQ
Can I turn my cat into a knight without a photo? Yes. Text-to-video works from a description alone, but it produces a generic armored cat rather than your specific pet, because there is no reference image to anchor fur pattern and face shape. The photo route is what makes the result recognisably yours.
What is the single most important thing in the photo? Both eyes visible and sharp. The face is where identity is judged, and the eyes are the fastest way for a viewer to confirm the animal is right.
Should I crop the photo before uploading? Cropping is fine and often helps, as long as you keep the whole head in frame and leave a little space around it. Do not crop so tight that the ears touch the edge, and do not upscale a small crop, because interpolation removes the fine fur detail that anchors the pattern.
Why did my cat come back with an extra paw? The prompt implied a body pose the photo did not show, so the model invented the hidden geometry. Use a reference photo that matches the pose you want and reduce the shot to one action.
Can I upload a photo of my dog instead? Yes. Dogs render as tiny armored knights through the same presets, with the same photo requirements.
What does a render cost? The default delivery spec is Standard · 1080p · 12s at 30 credits. The Standard 720p twelve-second render shown on the pricing cards is 10 credits, and 480p at twelve seconds is 5 credits. Longer clips scale linearly and round up. New accounts through Google sign-in start with 30 credits once, which covers exactly one 1080p render, while email sign-ups build a balance through a daily check-in.
Where do I start? Open the main page, sign in, upload your sharpest and best-lit photo, and run a 480p render to check that identity anchoring is holding before spending 30 credits on the 1080p default.